When I knew I was going to Indonesia, I also knew that I wanted to visit Yogyakarta City. I am an art lover and Yogyakarta is renowned as a centre of classical Javanese fine art and culture such as batik, ballet, drama, music, poetry, and puppet shows. After walking and driving around the city for a bit, I was introduced to an “artist” who “created” and “taught” Batik art. Now the reason for the quotations around artist, created and taught is because this so called artist was a sham. Unfortunately, I didn’t know this until I paid for a one day art class with him. Nonetheless, I still had fun attempting to create Batik art for the first time.
The Design Process
First you take a cloth the size of your liking that is made of cotton or silk. Then you sketch a design onto the fabric using charcoal or graphite (in my case, I used pencil). Traditional batik designs utilize patterns handed down over the generations but really anything goes. Once the design is drawn out onto the cloth it is then ready to be waxed. Wax is applied to the cloth over the areas of the design that you wish to remain the original colour of the cloth.

Then the cloth is dyed in the first dye bath. The colour you choose during this process should be the lightest colour you plan to use. All of the cloth will be the first colour you choose (say yellow), except for where you applied the wax. The waxed areas will remain the same colour as the cloth. After the dye is applied, the cloth is washed using a special solution and left to dry.

Then the second layer of wax is applied to the area of which you want to remain “yellow.” Then a second layer of dye is applied to the cloth. Let’s say this dye is blue. All of the area that is not covered in wax will become blue, or because it is mixed with the yellow, may become green. Then the cloth is rinsed in solution and left to dry.

If you wish to add a third colour, then you cover the areas in wax of which you wish to remain blue-green. Then you would add the third die colour to the cloth. If you wish to add more colours, you continue the same process. Remember it’s important to start with the lightest colours first.
After the final dye bath and when the fabric is completely dry, the wax is removed. This can be done by ironing it off between sheets of newspaper or by boiling it off in water. After it is dry, you are finished. You can then frame your batik or do as you wish. If you would like to wash your batik, it is okay to do so in the washing machine without creating any damage.
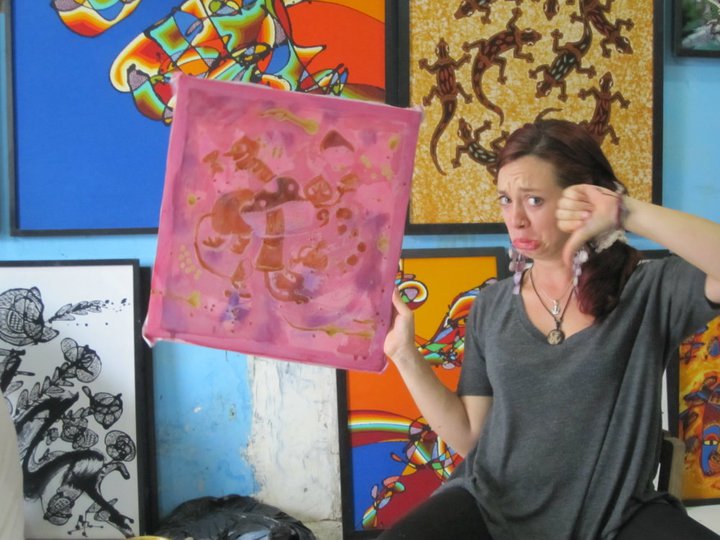
This is my finished project. It’s definitely not my best work. haha. Better luck next time.


1 Comment
A nice painting you did. It’s looking really amazing and awesome.
Thanks